How to Stake ALPH
Updated: 2026-09-29
This guide shows how to stake ALPH on Alephium mainnet, approve the transaction in your wallet, and verify the resulting position on the GoldShell dashboard.
After a successful stake, ALPH is locked and xALPH represents the staking position. The xALPH to ALPH conversion rate can change as rewards accrue. See Alephium's staking documentation for an explanation of xALPH.
The screenshots show the GoldShell ALPH staking flow on Alephium mainnet. APR, conversion rate, estimated xALPH, fees, reward frequency, release period, and balances can change. Treat screenshot values as examples and confirm the live values before submitting a transaction.
Before you start
- Open the GoldShell ALPH Staking page.
- Connect an Alephium mainnet wallet that holds the ALPH you intend to stake.
- Keep enough ALPH available to pay the network fee.
- Confirm that the wallet is connected to Alephium
mainnet. - Never share your private key or seed phrase.
1. Enter the staking amount
-
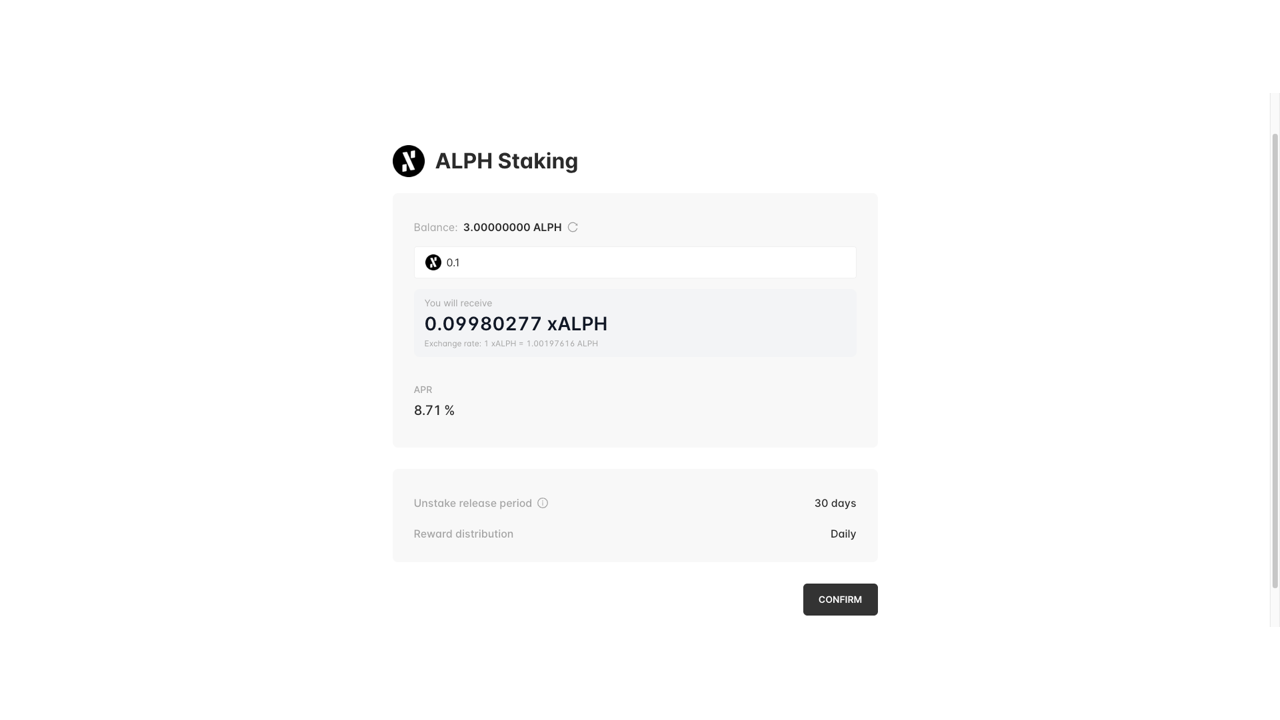
Check the amount shown next to Balance: for the connected account.
-
Enter the amount of ALPH you want to stake.
-
Review the estimated xALPH you will receive and the displayed exchange rate. The conversion rate can change over time.
-
Review the current APR, unstake release period, and reward distribution frequency.
-
Leave enough ALPH for the network fee, then select CONFIRM.
APR is variable and is not a guaranteed return. The screenshot values are examples, not fixed product terms.
2. Review and sign the transaction
The Alephium wallet opens a dApp transaction review.
- Verify the dApp domain, connected account, and network. Confirm that the wallet review is for
stake.goldshell.comonmainnetand matches the GoldShell page you opened. - Review the smart-contract call, ALPH amount, and estimated network fee.
In these screenshots, the wallet call shows 0.20 ALPH: the 0.10 ALPH stake plus an additional 0.10 ALPH fee. The wallet displays the estimated network fee separately. Fees can change, so review the live transaction breakdown before signing.
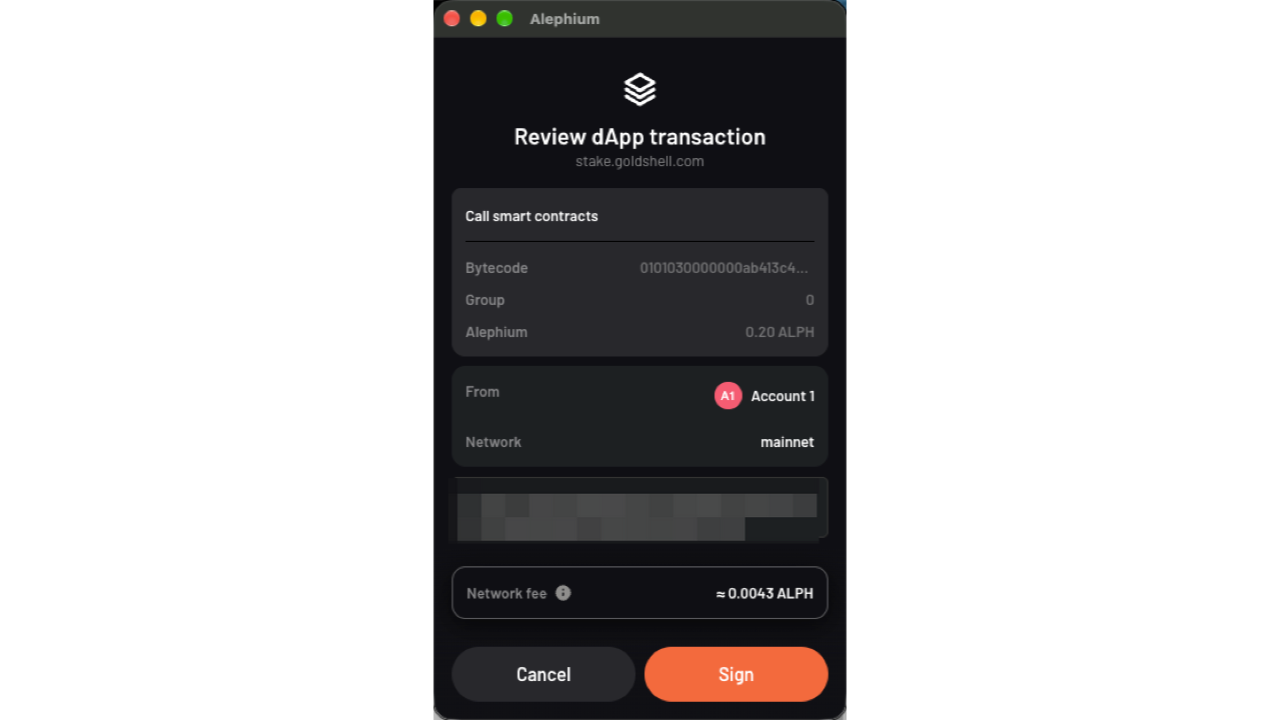
Before signing, stop if the domain, account, network, contract action, amount, or fee differs from what you intended.
- If every detail is correct, select Sign. Otherwise, select Cancel and return to the staking page.
3. Wait for confirmation
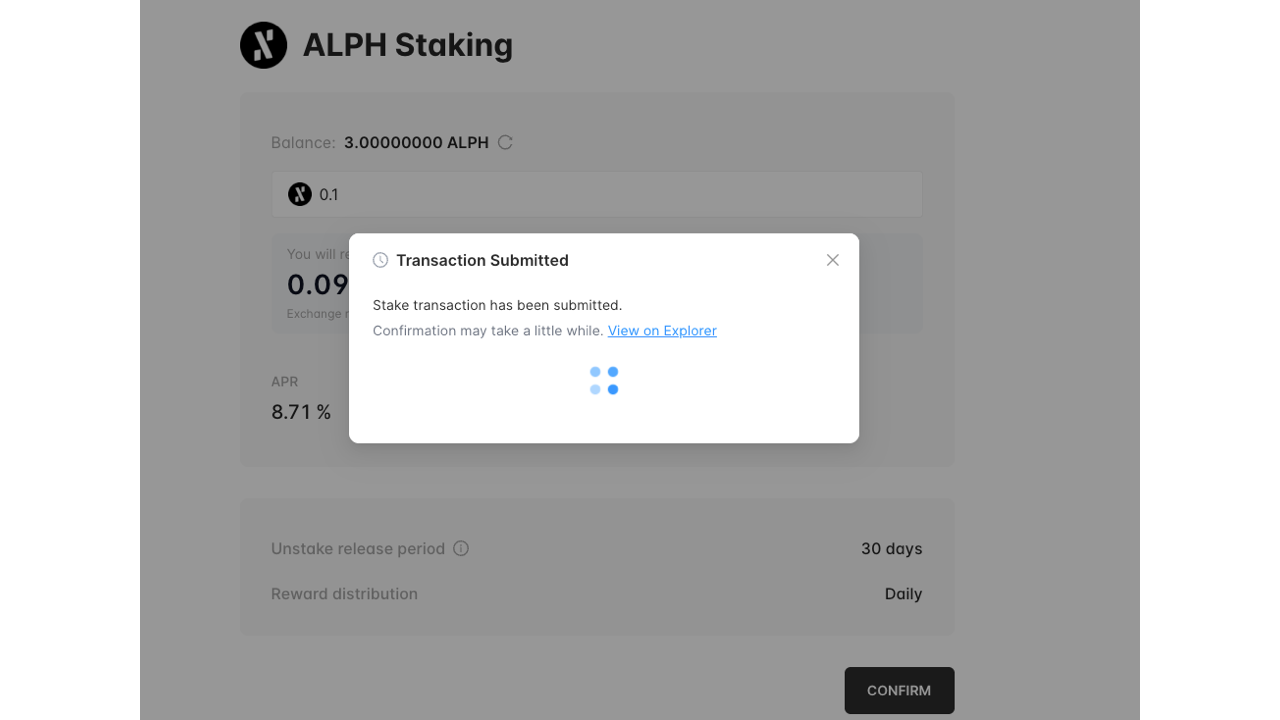
- After signing, wait while the staking page displays Transaction Submitted. Do not submit the same stake again until you know the first transaction's status; you can also check it in the wallet.
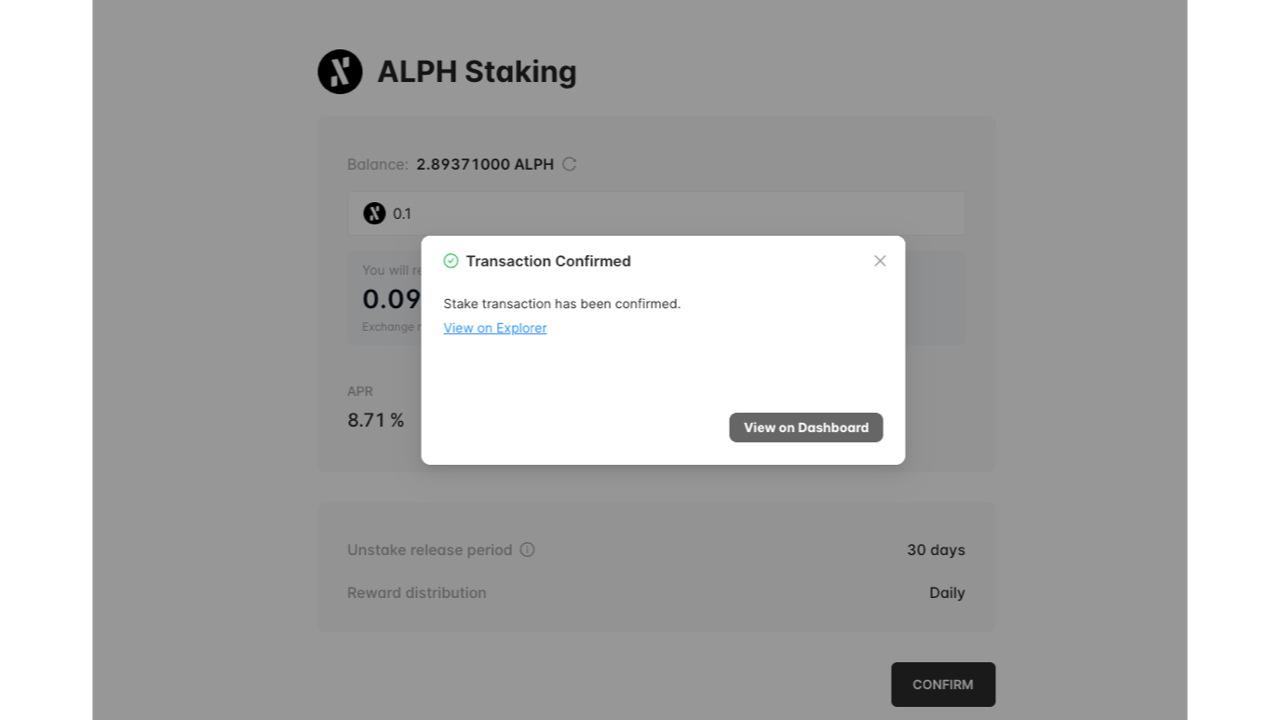
- When the dialog changes to Transaction Confirmed and makes View on Dashboard available, select View on Dashboard.
4. Verify the staking position
- On the dashboard, review Staked ALPH, xALPH Balance, xALPH Price, and Claimable ALPH.
- Check Reward History for available reward records. When the claimable balance is zero, Claim may remain unavailable.
The dashboard value may differ slightly from the amount entered. Use the dashboard and wallet transaction record to verify the actual result rather than inferring the cause from a screenshot.
5. Claim rewards or unstake
- When Claimable ALPH is greater than zero and Claim is available, select it and review the wallet transaction before signing.
- To exit the position, select Unstake, then follow the live interface and wallet prompts.
Claiming and unstaking affect assets. Verify the domain, account, network, amount, contract action, fee, and current release period before signing. The screenshot shows a 30-day release period; check the live interface for the current term.
The screenshots do not show the complete claim or unstake flow. Keep each wallet transaction record until the operation is confirmed.